Astrophotography is a fascinating way to capture the beauty of the universe. With the widespread availability of DSLR cameras, many enthusiasts are venturing into capturing stunning images of the Milky Way and other celestial wonders. Photographing the night sky is not only a recreational activity but also a way to connect with the vastness of the cosmos and gain a deeper understanding of astronomical phenomena. Through astrophotography, we can explore the immensity of space and reveal details often invisible to the naked eye.
With the right technique and a bit of patience, any photographer can capture impressive images of the Milky Way. Using DSLR cameras, which offer manual control over settings like exposure, aperture, and ISO, is particularly effective for this type of photography. In addition, choosing the right location and timing plays a crucial role in image quality. In this article, we will explore how astrophotography techniques work with DSLR cameras, the advantages of photographing the Milky Way with this equipment, and essential tips for achieving the best results.
How Astrophotography Techniques Work with a DSLR Camera
Astrophotography techniques with DSLR cameras are based on fundamental photography principles, adapted to capture the faint light of stars and other celestial objects. The first thing to understand is the importance of exposure. In astrophotography, exposure times need to be significantly longer than in daytime photography, allowing the camera to collect more starlight. Exposures between 15 and 30 seconds are common, depending on lighting conditions and camera sensitivity.
Aperture is another critical factor. A lens with a wide aperture (low f-number) allows more light to enter the camera, which is essential for capturing night sky details. Lenses with apertures of f/2.8 or lower are often recommended for astrophotography, improving image quality and reducing noise.
ISO adjustment is also important. ISO determines the camera sensor’s sensitivity to light. A higher ISO may be necessary for astrophotography but can introduce noise. It is crucial to find a balance between enough sensitivity and acceptable noise levels. Most photographers recommend starting with an ISO around 1600 and adjusting as needed.
Finally, image composition is essential. The Milky Way is a spiral structure stretching across a wide area of the sky. Finding a location with minimal light pollution and a clear horizon makes a big difference. Including foreground elements like trees, mountains, or lakes can add depth and interest to the composition. By combining all these elements, photographers can create impressive images that capture the beauty of the cosmos.
Advantages of Photographing the Milky Way with a DSLR Camera
Photographing the Milky Way with a DSLR camera offers several advantages that make this experience rewarding and accessible. One of the main advantages is the full manual control DSLR cameras provide. Photographers can adjust aperture, ISO, and shutter speed to experiment and find the ideal combination for night conditions, especially important in low-light settings.
Another significant advantage is image quality. DSLR cameras typically have larger sensors than compact cameras or smartphones, capturing more light and detail. This results in sharper images with better resolution, revealing subtle details of the Milky Way that might be lost with lower-quality equipment. The ability to change lenses adds flexibility, allowing photographers to choose the most suitable lens for each situation.
Durability and robustness are also important factors. Many DSLR models are built to withstand harsh conditions, making them ideal for outdoor night use in remote locations where weather can be unpredictable. Most DSLR cameras also include stabilization systems that help avoid blurry images during long exposures.
Finally, DSLR astrophotography benefits from a large community and wealth of available resources. There are countless tutorials, forums, and online groups dedicated to astrophotography, where photographers can share tips, tricks, and experiences. This knowledge exchange is valuable for both beginners and professionals.
How to Photograph the Milky Way with a DSLR Camera: Essential Tips and Tricks
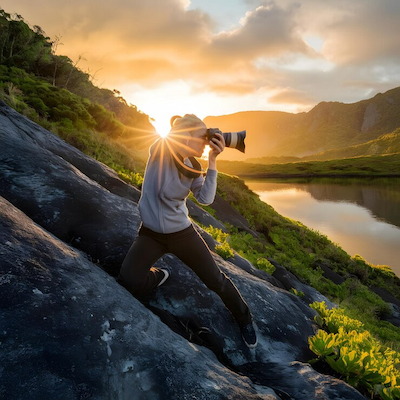
Photographing the Milky Way may seem challenging, but with the right tips, you can achieve impressive results. Here are some guidelines to help you capture the night sky’s beauty with your DSLR camera:
Choose the right location: Look for a place far from city lights with minimal light pollution. National parks or rural areas are ideal. Use apps that show night sky quality and Milky Way position.
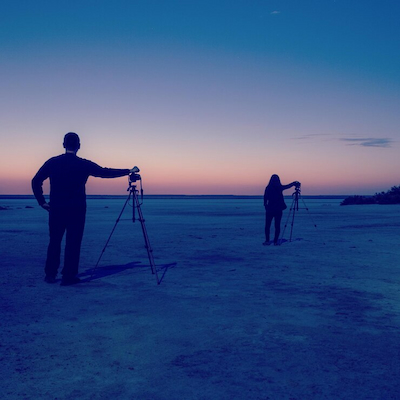
Use a tripod: A tripod is essential to keep the camera steady during long exposures. It prevents blurring and ensures sharp images. Make sure it’s stable on the ground.
Set up your camera: Switch to manual mode. Use the widest possible aperture (f/2.8 or lower), choose an ISO between 1600 and 3200, and try exposure times between 15 and 30 seconds. Test different settings to find the best result.
Focus on the stars: Use manual focus and set it to infinity. This ensures stars appear sharp. If needed, use a red flashlight to see your settings without affecting your night vision.
Use a remote or timer: To avoid shaking the camera when pressing the shutter button, use a remote or the camera’s timer. This helps keep images sharp.
Experiment with composition: When photographing the Milky Way, consider including foreground elements like trees or mountains for added depth. Try different angles and compositions until you find one you like.
Once you follow these tips, you’ll be better prepared to capture the essence of the Milky Way. Remember that practice leads to improvement—don’t be discouraged if your first photos don’t turn out perfectly. Keep experimenting and learning with each attempt.
Inspired to Photograph the Milky Way with Your DSLR Camera?
Astrophotography is an exciting journey that allows us to explore and appreciate the cosmos in a unique way. By learning the techniques and tools needed to capture the Milky Way with a DSLR camera, you unlock a world of creative possibilities. Each image becomes a window into the universe, revealing stories and details beyond our everyday experience.
We hope this article has inspired you to grab your camera and head out to photograph the night sky. With patience and practice, you can create stunning images that reflect the beauty and majesty of the Milky Way. Don’t hesitate to explore more about astrophotography and share your experiences with other enthusiasts. The universe is waiting to be discovered!
Frequently Asked Questions
How can I prepare my camera to photograph the Milky Way with a DSLR camera?
First, set your camera to manual mode. Choose a high ISO between 1600 and 3200. Use a wide aperture like f/2.8 or lower. More light is better!
What lens should I use to photograph the Milky Way with a DSLR camera?
A wide-angle lens is ideal. Lenses between 14mm and 24mm work well. The wider the aperture, the better!
Where is the best place to photograph the Milky Way with a DSLR camera?
Look for dark areas away from light pollution. Mountains or national parks are great choices!
When is the best time to photograph the Milky Way with a DSLR camera?
A clear, moonless night is perfect. Check the lunar calendar! The months from June to September are ideal.
How long should I expose the image when photographing the Milky Way with a DSLR camera?
Start with 15 to 30 seconds of exposure. Adjust as needed. Test and see what works best!
What software can I use to edit my Milky Way photos?
You can use editing software like Adobe Lightroom or Photoshop to enhance contrast, reduce noise, and bring out more detail in your night sky images.
Can I photograph the Milky Way in the city?
It’s very difficult due to light pollution. Try to travel to darker areas or use light pollution filters, but rural or remote locations are strongly recommended.
Is post-processing essential in astrophotography?
Yes. Post-processing helps reveal details that aren’t visible straight out of the camera. Editing is a major part of the creative process.
What accessories can help improve my Milky Way photos?
Useful accessories include a sturdy tripod, remote shutter release, headlamp with red light, and extra batteries. A star tracker can also help with longer exposures.